It’s Valentine’s Day, whee!
(It’s also Ash Wednesday, so I will not be eating much, if any, chocolate today, and will be celebrating tomorrow in the usual manner – pizza, movie, and truffles. Yay!)
So, in the spirit of whatever you choose to do with Valentine’s Day, let’s talk about chocolate – its different forms, and when and how to use them. I’m also including both a chocolate biscotti recipe at the end of the post, as well as a roundup of all the tasty chocolate things I’ve posted in the past.
Cocoa
Cocoa powder is the end product after cacao beans have been fermented, roasted, and pressed, as well as have most of the cocoa butter removed. There are two main types of cocoa found in most U.S. grocery stores:
Natural Cocoa Powder. The classic – acidic, bitter, and a strong cocoa flavor. This is the stuff Hershey’s puts out in the brown tins, and is what you’ll find if it’s not labeled as dutch processed.
Dutch-Processed Cocoa Powder. This is also labeled as “alkalized,” meaning it’s been processed with an alkali solution to neutralize cocoa’s natural acidity. This process (called “dutching”) results in a mellower, less bitter cocoa with a neutral pH. The color of baked goods using dutched cocoa tends to be darker, too.
For the most part, the one you use is a matter of taste. I tend to like the bitterness and stronger flavor of natural cocoa, so I default to it. Older recipes (especially those from early last century and before) are also talking about natural cocoa, since dutch-processed cocoa wasn’t widely available.
The acidity matters most in which type of leavener (baking powder or baking soda) you use. Bear with me for a moment of SCIENCE.
Remember the volcano experiments from elementary school, where you combined vinegar and baking soda to create an eruption? That has practical application in baking: a balance of acidity (like cocoa) and basicity (like baking soda, or bicarb soda) creates that foamy reaction (albeit on a smaller scale) to leaven and flavor your baked goods.
Baking soda is an alkaline (basic) powder, and can be quite strong – it’s used for baking, cleaning, and other applications. If you’ve tasted a pinch of it, or have ever gotten a bite of a cookie with an unsifted chunk, you know that pure baking soda tastes salty, bitter, and metallic. Not delicious. It’s used in relatively small amounts in baking because of its strength and taste.
Recipes that call specifically for natural cocoa usually use baking soda, since it has a higher (basic) pH. Too much baking soda without an acidic element (such as cocoa), and your baked goods a) may not rise properly and b) may taste soapy and bitter. Bleck.
Baking powder is a combination of baking soda and an acidic powder, such as cream of tartar, making it neutral when added to baked goods, since it creates its own reaction without another acid. It still doesn’t taste good on its own, but because the flavor and strength are mellowed, you’ll usually find larger amounts called for in recipes.
Recipes that call for dutched cocoa usually use baking powder. Neutral cocoa, neutral leavener.
Use the type of cocoa specified by the recipe. If the type isn’t listed, it’s usually best to use natural cocoa. For non-baking applications, such as hot cocoa, frosting, and the like, go for the one that’s tastiest to you.
And, as always, get the best stuff you can afford, in taste, quality, and being cool to your fellow humans (i.e., fair trade and better) and the environment. Your mouth and the planet will thank you.
Baking Chocolate vs. Chocolate Chips
Once upon a time, I tried to make ganache for truffles. Long story short, no matter if I refrigerated, froze, or yelled at the ganache, it just. Would. Not. Hold its shape.
I followed the recipe’s ratios exactly – chocolate to cream – and figured it was the addition of booze that collapsed my chocolate. And then, I read the recipe again: chocolate to cream.
I had used chocolate chips, thinking hey, this is cheaper, and it says chocolate on the package!
So, let’s talk about the difference between the two types, and why your ganache, frosting, or whatever might not be setting properly.
Baking chocolate, or chocolate designed for baking applications (this can come in bar or wafer form), is just that: processed cacao, cocoa butter, sugar, and maybe milk, depending on the type. The ratios of each vary (hence, dark, milk, etc.), but the important thing to remember is that baking chocolate melts fast and loose.
Chocolate chips, on the other hand, are designed to hold their shape when heated. Thus, stabilizers are added to the chocolate mix to make this happen.
For many applications, either one is fine to use, although you’ll get different results. If you want smooth, thin drizzles, or big pockets of melty chocolate in cookies, use baker’s chocolate. If you want classic chocolate chip cookies, or thicker coatings for dips or drizzles, use chocolate chips.
Ganache, however, is a different story. You must balance the fat (usually cream) with the fat and other ingredients in your chocolate. Chocolate chips, with the added stabilizers, can throw the ratios out of whack, making your ganache goopy, gloopy, or just…not ganache. Always use chopped baker’s chocolate for ganache, no matter the application.
And one final note: substituting novelty chocolate bars, such as those found at the checkout counter or the candy aisle at the grocery store, for baker’s chocolate, won’t work, either. There are usually a lot of added ingredients, including stabilizers, to these chocolates. Save them for eating as is!
Melting Chocolate
Finally, let’s talk about melting chocolate and tempering.
If you’re wondering why the melted chocolate from professionally-made goods (such as truffles, bars, and the like) are shiny and snappy, while yours may be soft and dull and possibly bloomed, it’s because of tempering.
Tempering chocolate means you’re heating and cooling it at precise temperatures to stabilize its structure into that snappy texture when cooled. There’s a good deal of science behind it, but since I already played my science card earlier in this post, I’ll save you the explanation and simply leave it at that.
Milk chocolate is heated (and then maintained for dipping or shaping) to 88 degrees F, while dark is heated to 91 degrees F. You can do this by using super low heat on the stove with a double boiler, or even using a heating pad, a heatproof bowl, and kitchen towels. Oh, and a thermometer.
The key is to maintain that temperature, without going over – otherwise, the chocolate won’t cool in the structure you want (shiny and snappy at room temperature). Stir, stir, stir, until you get the proper temperature and texture. (You can test the texture by dipping a butter knife in the chocolate, allowing it to sit, and checking on the texture – if it’s dry and shiny, it’s tempered! If it’s wet or bloomy, oops. Keep trying.)
Do I bother with hardcore tempering? Sometimes. However, for simplicity’s sake, I’ll usually do the following cheat method for melting chocolate for dipping and drizzling:
Heat half of your chocolate in a heatproof bowl in the microwave for 30 seconds to 1 minute (depending on the amount). Remove, and add the remaining unmelted chocolate to the bowl, and allow to sit for 1 minute. Stir with a spatula until all the chocolate is melted. Use quickly.
Will this result in perfectly tempered chocolate? No – tempering properly takes patience and time. Will it result in chocolate that I can drizzle over biscotti and dip things into? Yes. And most of the time, I actually get a decent texture in the dried result. Also, we eat our chocolate-dipped goodies faster than a bloom can really appear, so there.
Chocolate Recipes!
And that’s it for today’s chocolate discussion. I’ll leave you with a list of some tasty chocolatey things to make, as well as a new recipe at the bottom using all of today’s skills.
- Chocolate Chip Cookies
- Chocolate Crackle Cookies
- Cocoa Brownies
- Chocolate Pecan Tart with Salted Caramel
- Chocolate Frangipane Tart
- Chocolate Peppermint Stout Cake
- Chocolate Truffles
- Cookies and Cream Truffles
- Old-Fashioned Cocoa Fudge
- Easy Hot Cocoa
Happy Valentine’s Day, and may your day be full of love and chocolate!
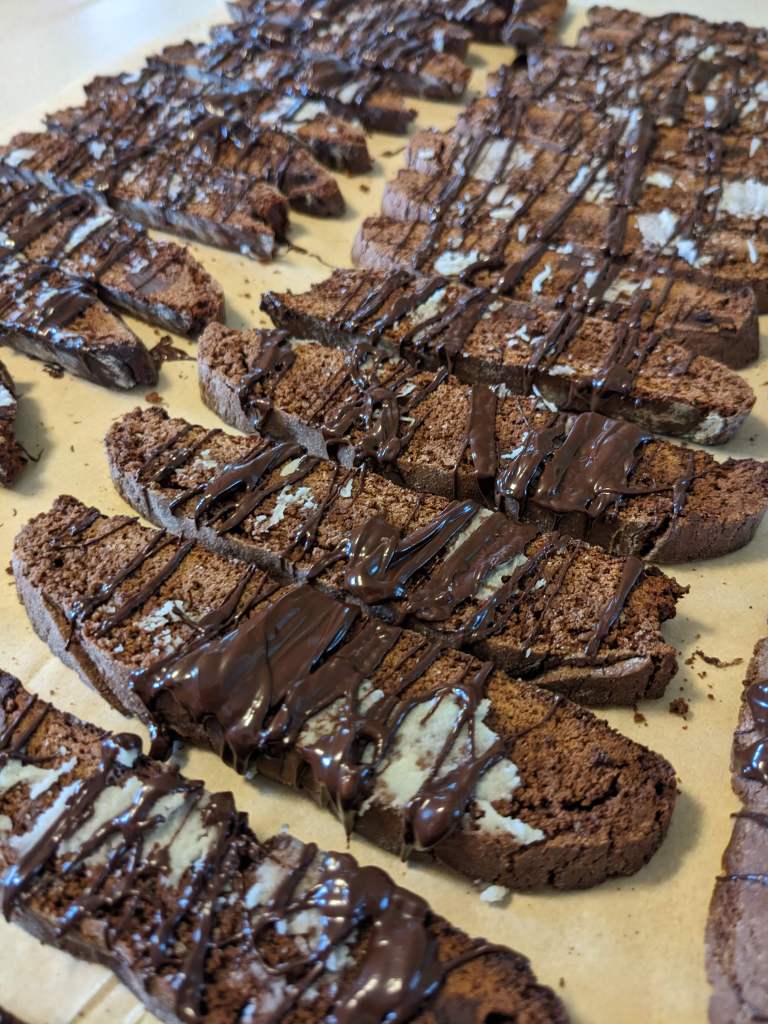
Double Chocolate Biscotti
A chocolate treat that’s perfect with a hot mug of coffee or tea.!
you will need:
- 1 1/2 c all-purpose flour
- ½ c Dutch-processed cocoa powder, sifted
- 1 tsp baking powder
- 1/4 tsp salt
- 1 c granulated sugar
- 4 tbsp butter, softened
- 2 large eggs
- 1 tsp vanilla extract
- 3/4-1 c chopped chocolate or mini chocolate chips
- Optional: 8oz milk, dark, or white chocolate
Directions
- Preheat oven to 375 degrees F. Line a baking sheet with a Silpat or parchment paper.
- In the bowl of a stand mixer or a large bowl, beat sugar and butter together on medium speed until light and fluffy, about 1-2 minutes. Add eggs one at a time, then add vanilla and liqueur or extract. Beat until thoroughly combined.
- In a separate bowl, whisk together the flour, cocoa, baking powder, and salt. Gradually add the flour mixture to the butter mixture, beating until just combined. Stir in chocolate. Clean and lightly flour a level surface, such as a countertop. Turn dough onto the countertop and divide the dough in half. Mold each dough piece into a flat loaf, each about 1 inch high, 3-4 inches wide, and 6-8 inches long, making sure to flatten evenly and smooth the tops so they bake evenly.
- Using a bench scraper, transfer the loaves to a baking sheet, a few inches apart, and bake at 375 for 25-30 minutes until golden and small cracks form on top. They will not rise or change shape much. Cool the loaves on the baking sheet on a wire rack for 7-10 minutes until cool enough to handle, but still quite warm. Lower the oven temperature to 300 degrees F.
- Using a serrated knife and a cutting board, slice each loaf into 1/2-inch slices, being careful not to break or crack the loaves. Place the sliced cookies back on the baking sheet, cut side down, and bake at 300 for another 10-15 minutes until they dry out, turning the cookies halfway through baking.
- Allow to cool briefly on the cookie sheet, then place cookies on a wire rack and cool completely. Dip in or drizzle with melted chocolate, if desired, and allow to sit at room temperature for about 1 hour until chocolate sets.
