In honor of Thanksgiving here in the U.S., as well as my pie class happening last week, let’s talk about cool things to do with pie crust!
We’re talking mostly shaping pie today, rather than a specific recipe for a specific pie. Recipes abound for pies, as well as crusts, and I’ve found that most pie recipes have a separate requirement (and recipe page, or link) to the crust itself, so I’ve got you covered there.
First, you’ll need a crust recipe. This is my go-to, and is pretty standard for an all-butter pie crust, as far as ratios go: All-Butter Pie Crust Recipe
Secondly, go make your pie crust. Feel free to double it. I’ll wait.
[cue Muzak]
Finished? Awesome! Let’s do some cool things with it.
Shaping & Baking Pie Crust
I’m going to assume you went ahead and doubled that recipe above so you have a lot of pie dough to play with. If you haven’t, go ahead and make more crust. I’ve got time.
For Full-Sized Pies
Here, we’re talking about what you’re probably thinking when we say “pie”: double-crusted fruit pies, custard pies (such as pumpkin, sweet potato, etc.), and quiches.
Roll out your prepared dough into a rough circle an inch or so bigger around than your pie plate and about ⅛-inch thickness.
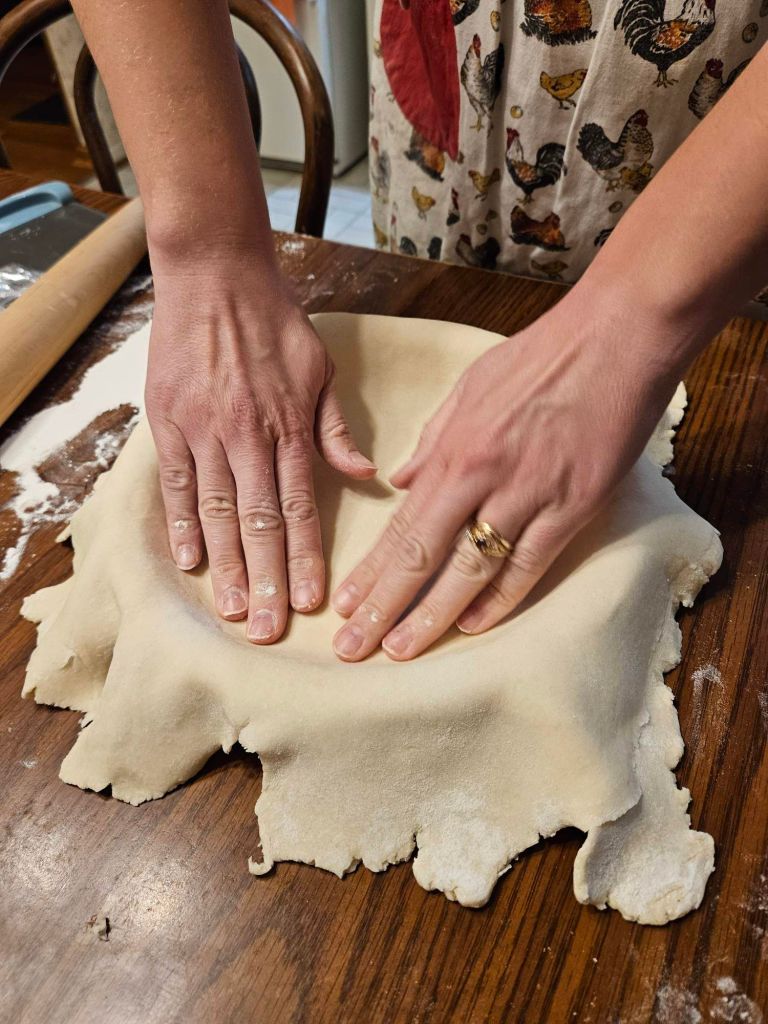
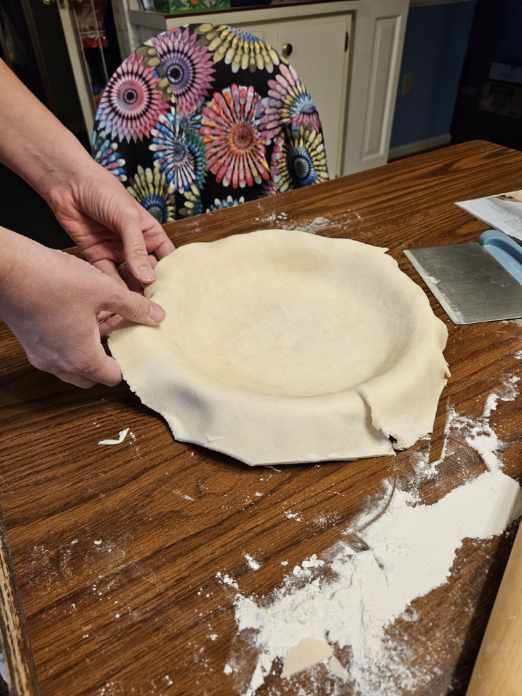
Transfer dough to your pie plate, cut off the excess (leaving about 1/2 inch beyond the edge of the plate), crimp, and fill as desired.
If making a double crust or lattice pie, repeat with remaining dough and top filled pie with second dough. (Scroll down for how to make a lattice and other cool shapes with your extra crust.) Otherwise, wrap and refrigerate or freeze second disc for later use. Pie dough can be refrigerated for about 2 days, or frozen for about 2 months.
Want to crimp your crust? Scroll down to the next section!
For Hand Pies
Lookie there – I’ve got a whole recipe for these! Hand Pie Recipe
For Galettes
These are free-form pies without a plate, and are great for fruit, veggies, or whatever your heart desires that isn’t too juicy (so, don’t try watermelon or anything silly like that). You can feel both lazy and fancy because you’re using a French word, but are also not bothering with a pie plate.
Roll out your pie dough to about ⅛-inch thickness on a sheet of parchment paper (this makes transferring to a pan much easier). Place your desired filling in the middle of the crust, about 2 cups. Using a sharp knife, make diagonal slits in the edges of the dough about 4-5 inches apart, about ¼ inch away from the filling. Fold dough over the filling (there will be a hole in the middle), and transfer to a baking sheet. Bake at 425 degrees F for 15-20 minutes until crust is browned and the filling is bubbly.
Crimping Pie Crust
Crimping the edges of your pie is super important. Not only does it make the edges look pretty, but it’s key to keeping your crust from slumping into itself while baking – it holds the pie in place, since all crust shrinks in the oven.
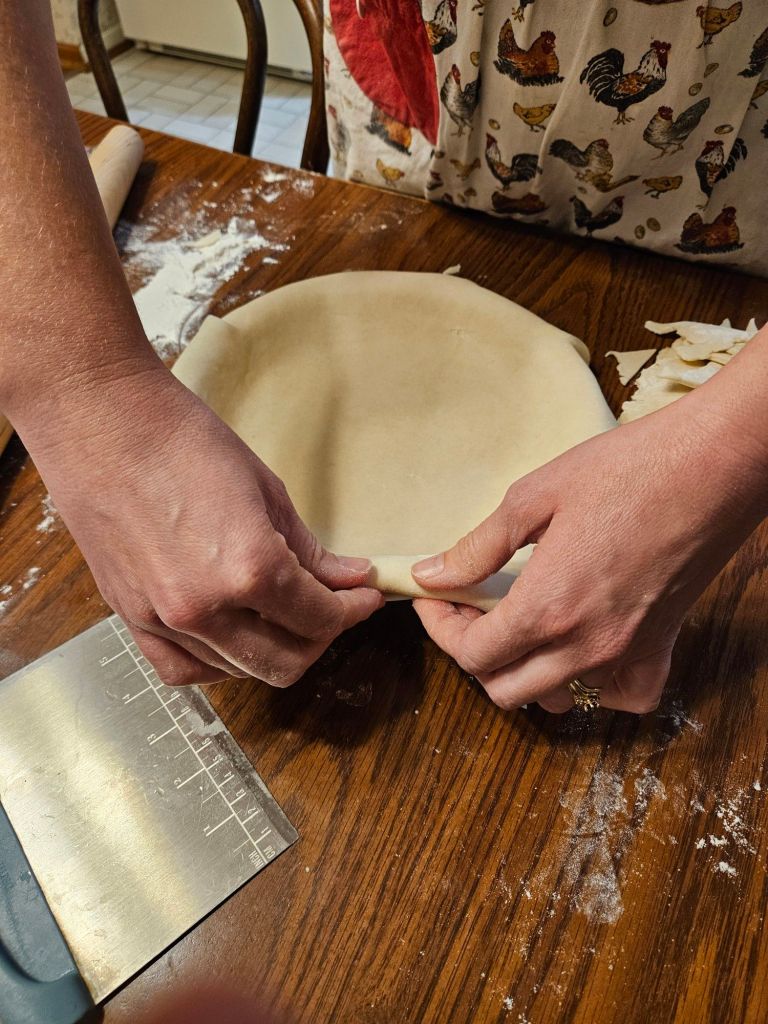
To crimp your pie edges, roll out dough to about 1-2 inches wider than your pie dish – I like to do this on lightly floured parchment paper for an easy transfer. Lift with parchment, or fold into quarters and unfold in the pie dish, then press into the dish. Cut off all but about half an inch of the dough beyond the pie plate edge. Roll edges underneath the crust to the edge of the pie dish.
You can “crimp” in a few different ways. The easiest method is to simply press the edges into the pie plate with a floured fork. Done!
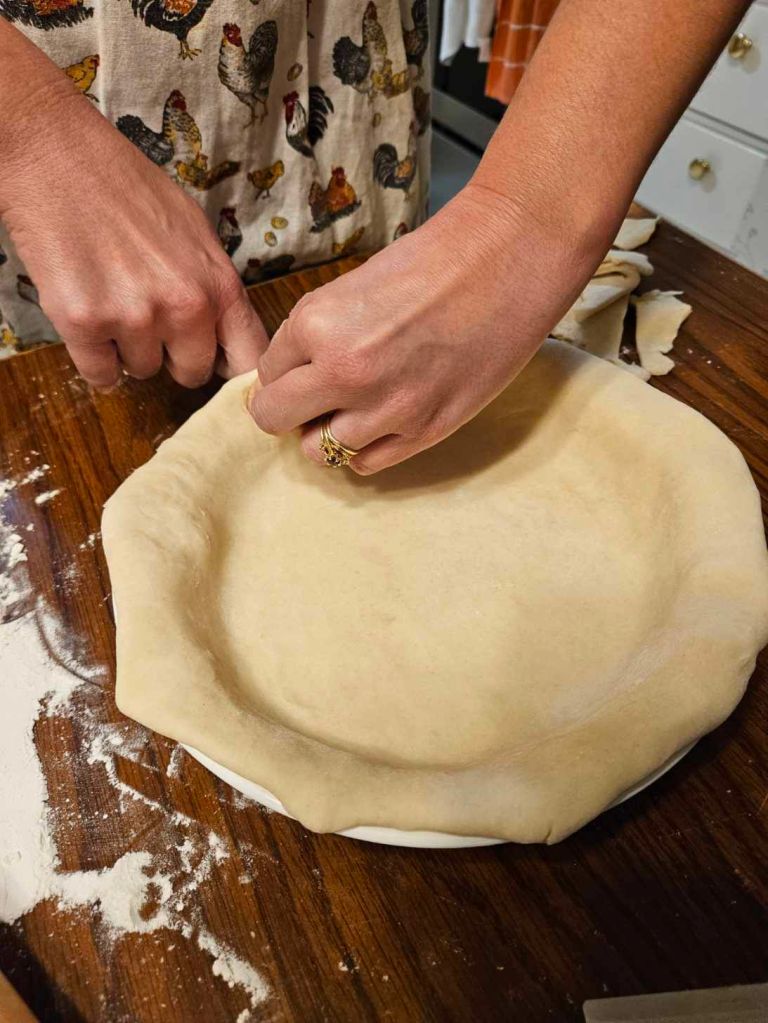
If you want something a little fancier, you can create the classic fluted crust. With floured fingers, push from the inside of the pie and pinch from the outside around the edge to create the fluted edge. Whatever shape you choose, make it bigger than you think you need to account for shrinking in the oven. Refrigerate for at least 30 minutes before baking, or freeze until needed.
Shaping for Lattice Crust, Braids, & Pie Shapes
Wanna get even fancier? Yay!
You’ll need extra dough, such as the second half of the dough for a double-crust pie, to do a lattice crust or other fancy shapes. For any of the following, roll out dough the same thickness as the rest of your pie, and be sure the dough is cold (and stays cold) while shaping. Be sure to refrigerate your shaped pie crust for at least 30 minutes before baking so it keeps its shape.
Lattice Crust
Using a pastry wheel, bench scraper, or knife, cut dough into strips of desired thickness (½-1 inch) and 1-2 inches longer than the diameter of your pie. Brush outer crust with water. Layer the strips, one at a time and alternating to create a basket weave pattern, and pressing strips into the edges of the dough. Cut off extra dough at the pie plate edge.
Braided Crust, Shapes, etc.
Cut dough into thin strips (½ inch thickness), and create braids of 2-3 strands. You’ll use 3-4 braids to place along the edges of your pie. Brush outer crust with water, and gently press braids along the edges of your pie, overlapping each braid by half an inch or so (you won’t notice the overlap once the pie bakes).


You can also cut out shapes (such as hearts, leaves, etc.) using floured cookie cutters or a sharp knife, and arrange them around the edges, or even on top of the pie. Cut off extra dough at the pie plate edge.
That about does it for today – hope this ups your pie game this year. Until next time, happy Thanksgiving however you choose to celebrate it, and merry homesteading!
