(or, for my pickle-hating friends, okra pickles, because it’s the same thing 🙂
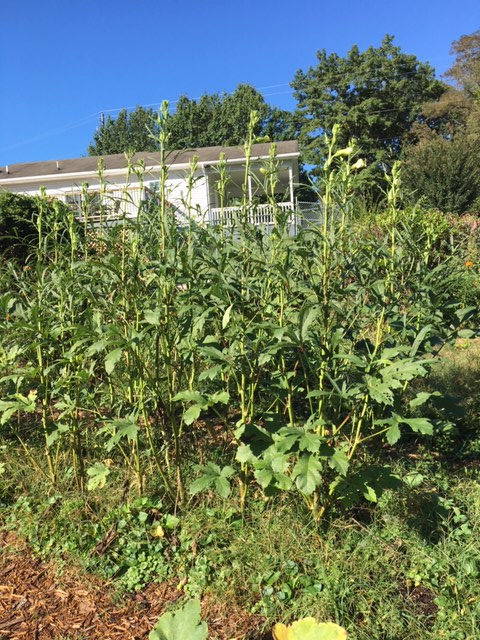
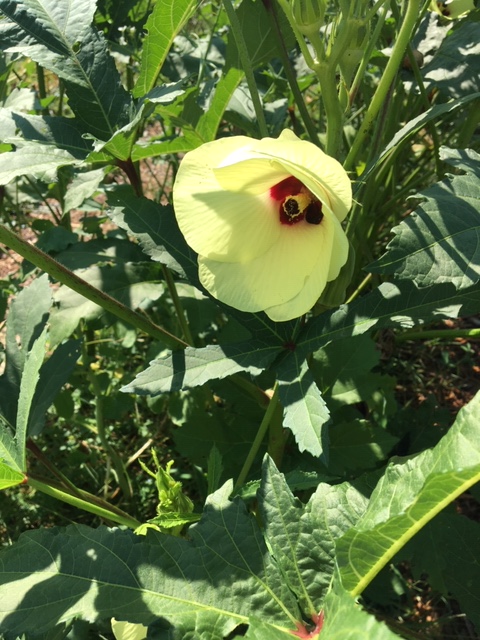
Okra is wonderful. The plant itself just keeps growing taller without bending or encroaching upon our other crops. The bell-shaped blooms attract honeybees and bumblebees (as well as wasps, ick), and if I’d known how beautiful they were a little over a year ago, I would have considered an okra bouquet for my wedding. Mmm, edible bouquet. The pods just keep coming, through rain and drought and heat and cold spells, and it’s a game every time we go out for a harvest – we catch most of the pods at their tender stage, but are sometimes surprised with a foot-long sneak just below eye level.
I love okra just about any way it’s prepared – fried, baked, smoked, roasted, pickled, souped, fermented, you name it. I’m in Camp Slime – the more mucilaginous the variety, the better. And it’s a good thing I like it so much, because we’re currently averaging about 10-15 pods a day these days, which means we’re cooking these babies just about every way you can. Husband even bought me an entire book dedicated to okra – its history, etymology, botany, and preparation in all of its stages – for our first anniversary (the paper one, in case you didn’t know). He knows me well.
Anyway, when you’re getting literal pounds of okra a week without even trying, you start to get creative. I can put okra into a lot of dinners, but sometimes, I do want to cook another vegetable, and I also want okra in the dead of winter. Enter pickled okra.

This recipe in particular is for preserved pickled okra, but you could probably get away with using it for refrigerator pickles. I have not tried to do so, so I’m not directly recommending it, but it’s better than recommending the other way around. If you are, in fact, planning to preserve food, you must make sure you follow the sanitizing and boiling directions for your jars and equipment, lest ye end up with contaminated food and food-borne illness. No thanks. But the directions are pretty easy and straightforward, and not nearly as strenuous as I always imagined. I’ll include the canning/pickling prep directions below the main recipe.
Ready to get pickled? (Hah!) Let’s go!
Pickled Okra

This recipe makes about 4-5 pint jars of pickled okra. The hot peppers are tempered with pickling, but you can choose to omit them (or add more!).
You will need:
- 3-4 lbs whole okra pods, stems trimmed (do not cut into the pods or the tops off entirely – you are only cutting the stem above the top)
- 2-4 hot peppers (such as jalapenos or serranos), stems and seeds removed and sliced in half
- 4-5 cloves garlic
- 2 tsp dill seeds or 4-5 dill flower heads
- 1/3 kosher salt (canning or pickling salt will also do – just make sure it’s not iodized salt or you’ll get a cloudy, metallic-tasting brine and product)
- 3 c white vinegar
- 3 c water
- calcium chloride (optional) – this helps keep the okra crisp during the canning process
Directions:
- Prepared canner, lids, and jars. (See directions below this recipe.)
- In a medium heavy-bottomed saucepan, combine salt, water, vinegar, and dill seeds (if using – reserve dill heads for later if using instead). Bring mixture to a boil, stir to dissolve salt, and lower the heat to a simmer until ready to use.
- Put one clove of garlic, 1-2 sliced peppers, and 1 dill head (if using instead of seeds) into each jar. If using calcium chloride, put 1/8 tsp in each jar. Pack okra pods into hot jars, leaving 1/2 inch headspace between okra and the top of the jars. Ladle enough hot pickling liquid to cover the okra into the jars, leaving 1/2 inch headspace. Remove air bubbles (cut okra will continue to produce bubbles as it releases air – this is okay), and add more liquid to get that 1/2 inch headspace as needed.
- Wipe rim with a clean, wet towel. Center lid on jar, and turn screw band on jar until there is resistance, and screw on until fingertip-tight.
- Place jars in canner, and cover completely with water. Bring water to a rolling boil, cover, and process for 15 minutes. Turn off heat, remove lid, and let sit for another 5 minutes. Remove jars to a cooling area, and process according to directions below.
Basic Canning Instructions
Make sure the jars, bands, and lids you are using are designed for canning – other jars may break when exposed to the high heat and boiling process of water canning. Make sure you are using new lids, as well – lids that have been used for canning beforehand will not create a seal, as the wax has been used. Screw bands and jars can be cleaned and reused for future canning.
You will need:
- glass jars designed for canning
- screw bands designed for canning
- sealing lids designed for canning
- a large pot with a lid that can accommodate your jars and cover them completely with water (I use a 12-quart stockpot) – this is your canner
- a small saucepan for lids
- heavy-duty tongs
- jar lifter
- a dish towel or canning rack for the pot
- Optional but super useful items: magnetic lid lifter, bubble popper (even a butter knife will do)
Directions:
- Wash jars, lids, and screw bands in hot, soapy water. Wash all materials used for canning thoroughly. Place screw bands aside to dry. Place your canning rack or clean dish towel at the bottom of your pot, and place jars on top of rack. Fill the jars about 2/3 full with water, and fill the canner up to that height with water. Fill the saucepan about 1/2 full with water and place lids in saucepan.
- Heat the canner and saucepan until the temperature reaches 180 degrees – do not boil. Keep hot until ready to fill.
- When jars are full according to your recipe and lids and screw bands are on, place the jars back into the canner. Fill the canner with water until the jars are completely covered by at least 1 inch. Bring to a rolling boil, cover, and process as above. (Different vegetables and pickles have different processing times.)
- Remove jars from canner, being careful not to overturn them, to a place they will be undisturbed for at least 24 hours.
- After 24 hours, remove the screw bands from the jars. Test the seals on the lids by carefully lifting the jars a few inches by the lid (use your common sense here and hold your hand around the bottom in case the lid doesn’t seal). If the center of the lid pops out (is not concave), and/or your lid does not stay sealed after testing, you cannot store these on the shelf – they must be refrigerated or re-processed. I recommend refrigerating, as re-processing a second time might make your product mushy or give it unpleasant flavors.
- Wipe lids and jar threads with clean, damp towel. Store sealed jars, with or without screw bands, in a cool, dark place for 6 months or more.

[…] regular pepper jelly. If you want to preserve this jelly, refer to my canning instructions in the Pickled Okra post; otherwise, you can use it as refrigerator jam. This jelly also uses powdered pectin and […]
LikeLike
[…] Strain mixture through a fine mesh strainer into desired containers. You can store this in the refrigerator for quite some time (vinegar is a heck of a preservative), or can it using the hot water bath method. […]
LikeLike
[…] your necessaries as needed over time. Better yet, if you have the space, get that garden going and learn to preserve foods – you won’t need to run to the store as often, whether during a normal month or a […]
LikeLike
[…] you’re preserving the jelly, you can use the same directions as for pickled okra regarding the hot water […]
LikeLike
[…] for longer canning preservation. If you need a refresher on basic canning directions, check out my Pickled Okra […]
LikeLike
[…] you’re preserving the jam, refer to my Pickled Okra post for a refresher. You can also put the jam in jars, allow the jam to come to room temperature, […]
LikeLike
[…] a refresher on hot water bath canning, see my Pickled Okra […]
LikeLike